Wave Resource Estimation Using DHI MIKE - Preparing a Coastline
Contents
- Introduction
- Coastline Data Resolution
- Creating a Mesh Generator File
- Importing the Data
- Saving your Work and Beyond
Introduction
This is a guide to preparing coastline data for analysis using the SW module of the DHI MIKE 21 suite, which is part of the DHI MIKE Zero group of applications. The guide assumes that DHI MIKE is installed on a Windows operating system; note that a DHI licence is not required for the following work, but will be required to calculate the results of the simulation.
The major steps in a DHI MIKE SW simulation are as follows:
- Import and prepare a coastline;
- Generate a mesh;
- Apply bathymetry data to the mesh;
- Set up boundary conditions;
- Add wind forcing information.
The first of these steps will be considered in greater detail here. Where work is required externally from MIKE (for data retrieval, etc) links to other wiki pages detailing these processes will be provided.
References
Some of the information written here can be found in the “MIKE ZERO Step-by-step training guide”, in fact many of the other training guides, such as the “MIKE 21 FLOW MODEL Step-by-step training guide”, may be required for this guide where knowledge is assumed. Unfortunately, no training guide is provided for the Spectral Wave (SW) module of MIKE, although a brief outline of the steps required is given in the “MIKE 21 SW User Guide”. Possibly the most useful resource for the process illustrated here can be found in the “MESH GENERATOR” section of the “MIKE ZERO PREPROCESSING & POSTPROCESSING User Guide”. It shows a detailed example of setting up a small mesh and this page follows the same structure. All the DHI MIKE documentation is provided with the installed software.
Coastline Data Resolution
The first step in producing a mesh for a MIKE 21 SW simulation is to import and prepare a coastline. The fidelity of this coastline is extremely important as the MIKE meshing tool will match the grid to each boundary point provided. The mesher is capable of adding additional boundary points but it is not capable of removing or ignoring some. This manipulation must be done by the user either in advance of importing the mesh into MIKE or within the MIKE mesh editor itself.
This restriction raises two important issues. Firstly, particularly for large simulations, various levels of refinement for coastline data may be required depending on the distance from the point of interest. This means that work must be done manually to either merge coastline data at different resolutions or manually edit the highest resolution maps within MIKE itself.This compounds the second issue which relates to the examination of spatial grid convergence; if it takes a large amount of human effort to prepare one coastline then the additional effort to prepare coastlines at three different resolutions may not be available. Even if this effort could be reduced by mixing existing coastline data sets, these only exist at a few different resolutions so there are not many possible combinations.
Ideally, an automated coastline generating database that could produce a whole coastline (or parts of a coastline) at a desired resolution would be available. Unfortunately, no such database currently exists but the process with which it would work is called ”cartographic generalization”. This process reduces the complication of maps as the distance from the point of view increases. Unfortunately, cartographic generalization is not perfect as this point, but some existing software (such as GRASS GIS) is capable of invoking a set of related methods.
More information about coastline optimisation can be found in Appendix B - Optimising Mesh Design in MIKE FM of [1] Before we can do anything with the coastline data, we must retrieve it and put it into a form that can be imported into MIKE. This process is described on the Wave Resource Estimation Using DHI MIKE - Retrieving Coastline Data page.
Creating a Mesh Generator File
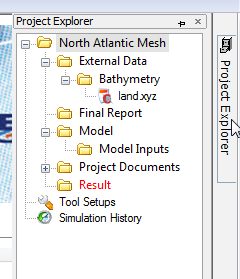
Once the coastline has been prepared in a compatible xyz format, it is ready to be imported into MIKE. First, create a directory to store the prepared coastline data by right clicking the External Data folder in the Project Explorer and selecting Add Folder…. Call the new folder Bathymetry and we will use this to store all the bathymetry data required for the simulation.

Next, to add the data file to the folder, right click the Bathymetry folder and select Add Existing File…. Locate the coastline data file created by MATLAB and then choose either Make copy or Create shortcut. This is a judgement call as to whether this data will be changed or not, whether it is worth the disk space to copy the data or if there already is a copy in the directory created by another means. Given that the data is probably in a MATLAB folder and might be overwritten I would choose to select Make copy. If, in the future, I told MATLAB to save coastlines in the new Bathymetry folder then I would just create shortcuts to them. Click OK. The coastline data file should appear in the directory structure.
So now we can create a mesh file. To do this right click on the Model Inputs folder and create another sub-folder called Bathymetry. Once that’s made, right click on the Bathymetry folder and select Add File…. The New File dialogue box (as seen in the figure above) should appear. From the MIKE Zero window, select Mesh Generator.
Map Projections
You’ll be asked for a map projection. The coastline data can be converted to whatever projection you are working in, so you can simply choose the most appropriate for the problem you’re working in. A blank workspace will open in the mesh editor. The coastline data can now be imported. I used a very rough outline of the UK, Ireland and northern France in a file called low_coast_40W4E40N60N.xyz. This is attached to this page if you want to try it out.
Importing the Data
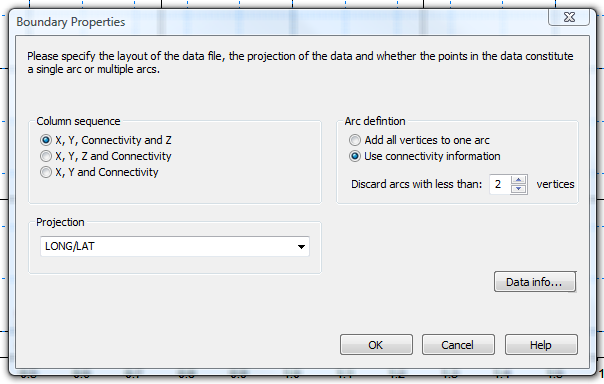
With the coastline data fie linked into your project explorer, you can now import it into the workspace. To do this go to the Data menu and select Import Boundary…. Find the file and click Open. A dialogue box should appear, thus:

The important part to watch for here is the Projection drop down box. In the case of “low_coast_40W4E40N60N.xyz” this should be set to LONG/LAT, but this depends on the projection that your land data was produced using. Everything else should work with the defaults.
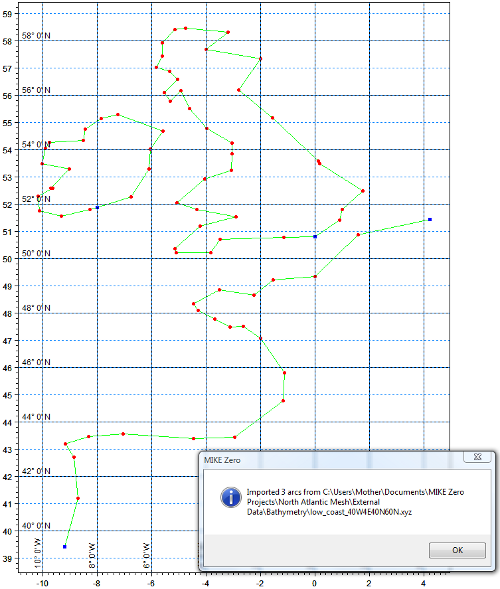
Click OK. You should end up with some coastline like the one below.

Saving your Work and Beyond
Our next task is to prepare the boundaries of the simulation so that a mesh can be generated. It is worth expanding the workspace to see the whole area that we wish to model rather than just the area containing the coastline data.
To change the workspace area go to Options > Workspace.
At this point it is recommended to save the mesh generator file. Remember to save it into the Model > Bathymetry folder. I named it north_atlantic_mesh.mdf.
[1]: Dix, J.K., Lambkin, D.O. and Cazenave, P.W. (2007) ‘Development of a Regional Sediment Mobility Model for Submerged Archaeological Sites’. English Heritage ALSF project no. 5524. School of Ocean and Earth Science, University of Southampton, U.K. 156pp.